It's an honor to host Imonkey's oekaki tutorial. I've loved
this artist's work since I first saw it on Kapolo Club's
oekaki 2 board. Powerful compositions with dramatic light
and shadow along with superb skin tones really make Imonkey's
work stand out! I'm sure you'll agree when you see the finished
product here. Thank you very much for the contribution,
Imonkey!
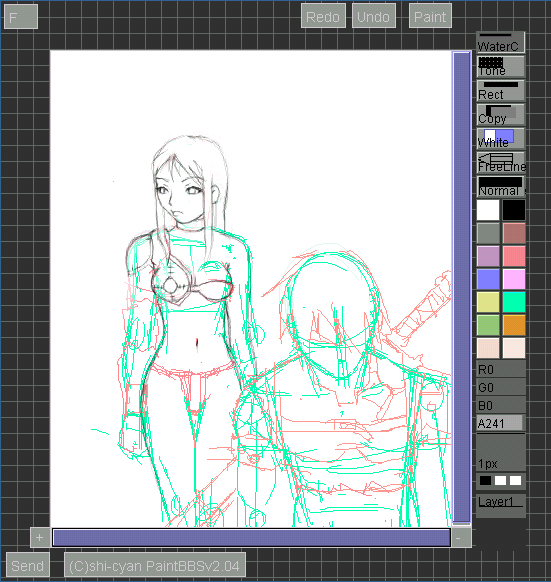
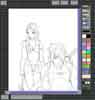
 Step
1: Draw in a rough on Layer0. In this example I used
green and red. Make the colors as light as possible
without making it too light for yourself. Use solid
colors so it'll be easier to see. Step
1: Draw in a rough on Layer0. In this example I used
green and red. Make the colors as light as possible
without making it too light for yourself. Use solid
colors so it'll be easier to see.
(please note: drawing with a tablet will save you a
lot of time and frustration.) |
 Step
2: The actual image is drawn in black watercolours on
Layer1. Erase the underlying image below as you draw.
Not necessary to do this if you still need the image
below. Step
2: The actual image is drawn in black watercolours on
Layer1. Erase the underlying image below as you draw.
Not necessary to do this if you still need the image
below. |
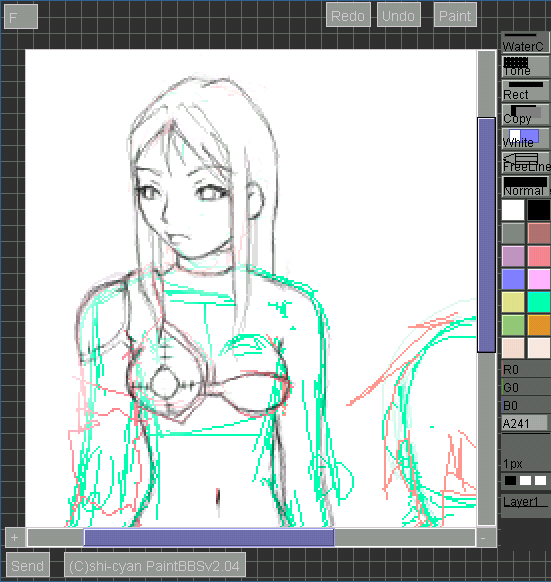
 Zooming
in frequently helps me keep everything as detailed as
I want it. Careful not to draw on the wrong layer. Keep
that in mind cause it's important! Zooming
in frequently helps me keep everything as detailed as
I want it. Careful not to draw on the wrong layer. Keep
that in mind cause it's important!
When finished, erase everything on Layer0. Easiest way
to do this is to left-click on the White button once
to WhiteRect. Stretch out this rectangle as you need
to. This is the best way to give you a clean white underlayer
for paint fills. |
 You'll
notice the drawing doesn't exactly coincide with the
Layer0 sketch plan. Well, that's okay, if you're inspired
to add or take away from an image do so till you're
satisfied with the end product. You'll
notice the drawing doesn't exactly coincide with the
Layer0 sketch plan. Well, that's okay, if you're inspired
to add or take away from an image do so till you're
satisfied with the end product. |
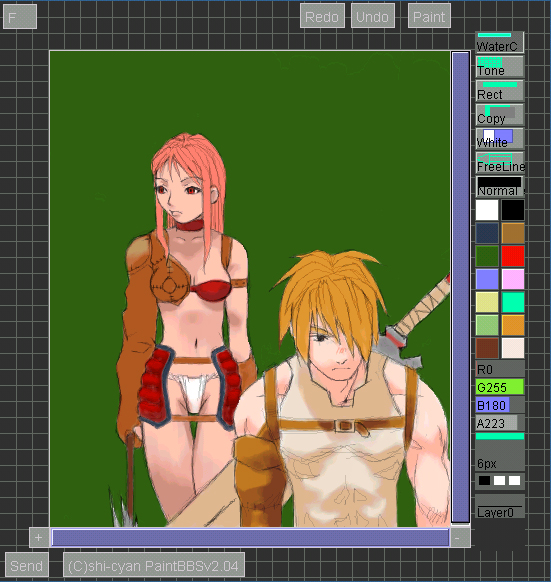
 Step
3: Color in base solids on Layer0. You'll notice it
doesn't affect the image that rests on Layer1. Step
3: Color in base solids on Layer0. You'll notice it
doesn't affect the image that rests on Layer1.
In this example I went ahead and put in shadows too.
Just easier for me that way I guess. |
 Step
4: This is where you're really supposed to add shadows
and such. I've decided to put them in the forest. Since
a forest is green, I filled the background with a dark
green base color. Step
4: This is where you're really supposed to add shadows
and such. I've decided to put them in the forest. Since
a forest is green, I filled the background with a dark
green base color.
If you don't get a clean paint fill you may hafta go
in with watercolours to finish the job. |
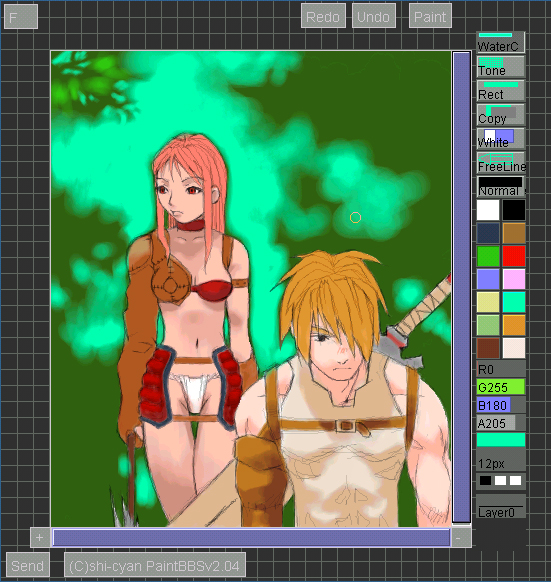
 Here's
where the magic starts. If you've got a good sense of
shape and color then you're set! If not, play around
with it for a while. The cool thing about oekeki programs
is the ability to undo or redo as many times as you
need to. Here's
where the magic starts. If you've got a good sense of
shape and color then you're set! If not, play around
with it for a while. The cool thing about oekeki programs
is the ability to undo or redo as many times as you
need to.
In this example I've envisioned them in a dense forested
path with bright light accenting the path way outside
behind them. So I start coloring the open path with
a lighter color than the base green.
|
|
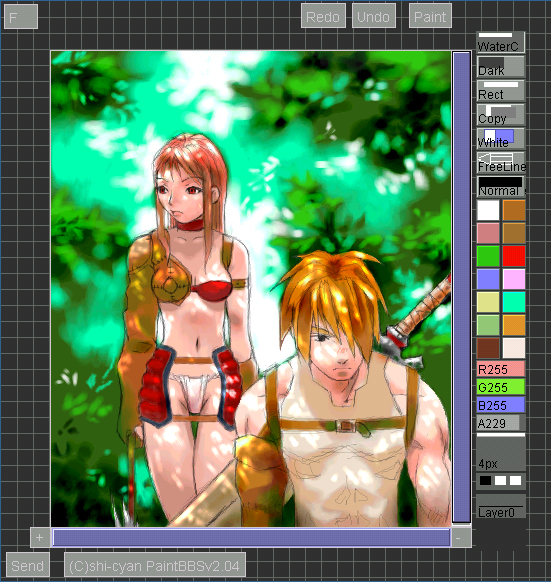
 A
further progression of using an even lighter color
to show the outside and well as regular green to show
the leaves in normal light. A
further progression of using an even lighter color
to show the outside and well as regular green to show
the leaves in normal light.
I've added more shade at certain places to give it
some ambience. For example the shade on the arm guard
contains the same green that's in the background.
I've also added shade to the hair this time around.
|
|
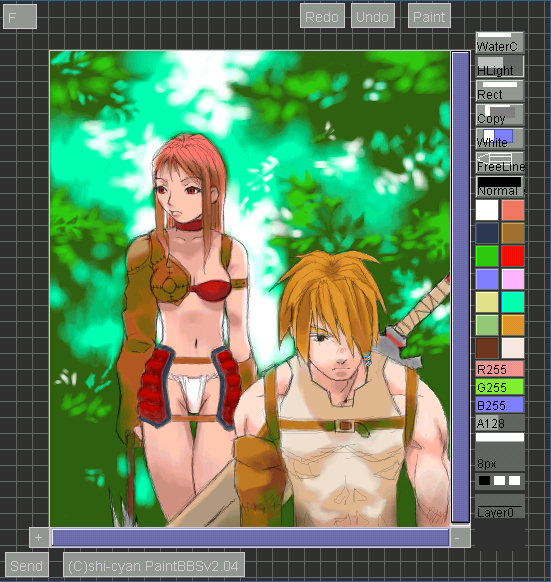
 Step
5: Highlights. To add highlights left-click the button
underneath the WaterC button till it changes to Highlight. Step
5: Highlights. To add highlights left-click the button
underneath the WaterC button till it changes to Highlight.
Apply highlight as you deem necessary. For this pic,
I chose to have light dabbling through the leaves
to show that they're deep in the forest.
|
|
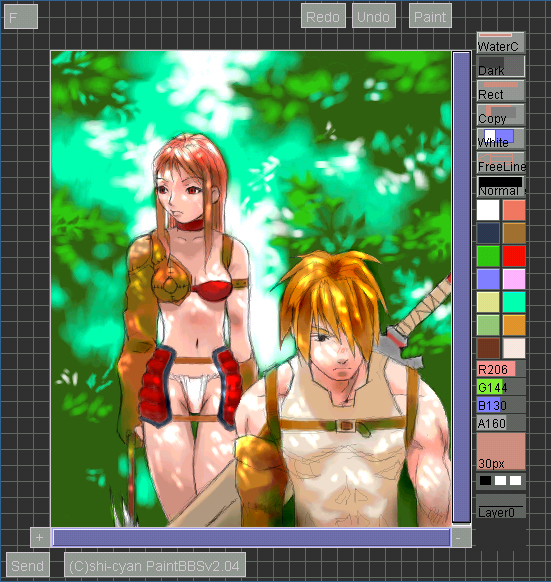
 Step
6: Finishing touches. Using the Dark button I gives
the foilage deep shadows and darken areas of interest
to fine tune everything together. Step
6: Finishing touches. Using the Dark button I gives
the foilage deep shadows and darken areas of interest
to fine tune everything together.
Viola!!!
Have fun with oekeki and practice, practice, practice!!
|
|
I don't know about the rest of you, but I think I
need a cigarette. Oh wait, I don't smoke. Ah! But
that was so good. Thanks again, Imonkey!
--Z
(Webmistress)
|